.
.

Wednesday, December 12, 2012

How to Send CCcam Server to DreamBox

by Unknown  |  at  11:00 AM


- Select an option as shown in the picture
2 - Select English
- Put IP Dreambox
4 - Put Page modem
5 - Enter user's name root
- Enter password dreambox
7 - then Click here to start the connection with dreambox


--> 

If the color appears green, it means that he has been successfully connect todreambox and if the red color appears be sure to enter a good data 

Then click FTP


 OPEN var FILE


OPEN etc FILE 

Locate subscription file, and then Select it and send it As is clear in the image

will show you the message click on yes to approve the replacement

as well the file be sent up successfully for Dreambox
For other contributions:
If you have a file subscription Newcamdyou send file to the track
var / tuxbox / config / newcamd
If it subscription file it mgcamd Send to
var / keys
If you have a subscription CCcam sent to
var / etc


Saturday, December 1, 2012

Trimax TM-6800HD+ (DVB S/S2, DVB-C,DVB-T) Combo HD signal analyzer meter

by Unknown  |  at  10:00 PM

 (DVB S/S2, DVB-C,DVB-T)

Trimax TM-6800HD+ (DVB S/S2, DVB-C,DVB-T) Combo HD signal analyzer meter      Trimax TM-6800HD+ (DVB S/S2, DVB-C,DVB-T) Combo HD signal analyzer meter


TM-6800HD+ is the latest HD model of portable signal analyzer meter form TRIMAX TECHNOLOGY LIMITED. By changing the tuner type three types of signal (DVB S/S2, DVB-C,DVB-T), can be easily achieved.
TM-6800HD+ can analyze the waveform DVB signal, analyze the constellation and the spectrum, recording stream, USB services etc. auto-detect the frequency symbol rate and play channels by CI+.
1. Versatile USB services, recording stream, playing recorded program, capturing and browsing picture, specification, software upgrade and etc.
2. User friendly OSD. Spectrum analyzer function max signal hold and TP search.
3. Display the channels constellation diagram dB, signal quality, FEC by the user-defined frequency.
4. Recording real time ASI stream by the port of BNC.
5. 20 Groups of tested data storage and display.
6. Connectiong to PC by mobile storage device, able to modify and browse tested data, soecufucatuib abd yograde, syooirts CI+.
- Sound alarm when lock signal
- Light alarm when lock signal
- Key board backlight lamp can view the keypad at night time
- Digital meter for signal strength and signal quality
- 4.3 Inch TFT LCD screen (16:9), which can play the program
- Blind scan, NIT scan
- Constellation analyzer
- Spectrum analyzer
- Stream recording by ASI
- Descrambling program by CI+
- Recording, play recorded program
- Capturing and browsing picture
- 20 groups of tested data storage
- Edit transponder, frequency, LNB type, symbol rate, QAM etc
- Auto calculate angle of AZ EL
- Upgrade S/W, parameters by PC, USB
- Car-charger
- Fast charge LI-ION  battery (1950Ma), can last around 3 hours
- Easy to carry

3 in 1 combo
DVB-S/S2, DVB-C, DVB-T
Input Frequency
920~2150MHz (DVB-S/S2, 47~865MHz (DVB-C, DVB-T)
Input Level
-80~-20dBm
Input Impedance
75 ohm
Power Out
13/18V (DVB-S/S2), 5/12 (DVB-T), 30V *(DVB-C)
Ku/C-Band
selectable
Min. Level In
About 35dBuV (noise)
Max Level In
About 90dBuV
Display of Signal Level
(analogue) dB on LCD/mknitor
Display of Signal Level
(digital) C/N, BER, FEC, MER
Audio and Video Input/Output
S-VIDEO, HDMI
Easy Satellite Manager
Edit, add and delete
22 KHz Tone
On/off/auto
DiSEqC
1.0, 1.1, 1.2, USALS
Power-supply
100-240V/50/60Hz 14.5V, 1.5Amp
Weight
0.60kg

Sunday, November 18, 2012

DVB WORLD USB DVB-S2

by Unknown  |  at  8:31 PM


Key Feature :
  • Support DVB-S Protocol (EN 300 744)&DVB-S2 Protocol (EN 302 307)
  • Support DVB-Data Protocol (EN 301 192)
  • Universal Serial Bus 2.0 Standard
  • Digital Satellite TV and Radio Program Receiving
  • HDTV (MPEG2&MPEG4/H.264)playing
  • Real Time Digital Video Recording (DVR) and Scheduling Recording
  • Time-Shifting
  • Electronic Program Guide (EPG)
  • Still Frame Capture
  • Multi Free Channel Preview
  • Subtitle
  • Satellite / Transponder Auto Scan
  • IP PID scanning, IP data broadcasting in LAN
  • MPEG2 Video broadcasting in LAN, Generate IP data broadcasting task automatically
  • IP MPEG4 media playing, IP MPEG4 media recording
  • Internet via Satellite
    DVB data service
    High download speed via satellite bandwidth
  • Favorite List
  • Full Screen Display
  • Multi language Switch
  • MPEG-II Software Decoding
  • Software Upgradeable
  • DiSEqC 1.2 / USALS Support
  • IR Remote Controller Available
  • Perpare CA & CI Modul Upgrade interface
Specification :
Tuner
  • Input Terminal: F-type 75 Ohm
  • Receiving Frequency: 950~2150 MHz Tuning Range
  • Input Level: -75~-10dBm
  • Carrier Capture Range : ±5MHz
  • Ambient Temperature: 0°C to +70 °C
  • Support MCPC and SCPC
Demodulator & FECDVB-S
  • Symbol Rate: 2~45Msps
  • QPSK filter: Root-raised cosine filter with roll-off 0.35
  • Punctured codes: 1/2,2/3,3/4,5/6,7/8 and Auto
DVB-S2
  • Symbol Rate:2~30 Mbps
    FEC QPSK:1/2, 3/5, 2/3, 3/4, 4/5, 5/6, 8/9, 9/10
???8PSK:3/5, 2/3, 3/4, 5/6, 8/9, 9/10
LNB & Switch control
  • LNB Supply Voltage: 13V/18V with Short Circuit Protection
  • DiseqC 1.2
  • Support Data Burst & Tone Burst
  • Antenna and LNB Control: 22KHz Ton
  • Max. LNB Supply Current: 450mA
USB interface
  • Bus Universal Serial Bus 2.0 Standard?????
  • B Type USB Female Connector
De–multiplexing
  • No. Section Filtering: 32PIDs
  • Engine: Software
  • Stream Capture: PES &TS
A/V Format
  • Video Format MPEG-II Main Profile & Main Level
  • Audio Format MPEG-II Audio Layer I & II
Power Adaptor
  • AC Input: 100 – 240 V ~ 50/60 H
  • DC Output: +9V 2.0A
Options
Compatible CAMs (Conditional Access Module)
Compatible CAM
Version
AlphaCrypt
1.0
Aston I
1.05
Astoncrypt
1.03
BataCrypt
1.0
Conax
4.0/4.00e
Cryptoworks
1.0/12011
Irdeto
1.06/2.09
Nagravision
All
Pentacrypt
1.05
SECA I & II
1.05
Viaccess
1.0 V481/ V483
Zeta Cam
N/A
  • Microsoft Windows 2000/XP/Vista


  • Desktop or Notebook


  • P3 500MHz CPU or above for SDTV


  • P4 2.0GHz CPU or above for HDTV


  • 128M RAM for SDTV / 256M RAM for HDTV


  • VGA Card with at the least 16MB Memory


  • One Free USB 2.0 Port


  • Microsoft Direct X 8.1 or above


  • Digital Satellite Dish & LNB


  • DVB World Box :
  • USB2.0 Box Power Adapter:


  • USB2.0 line


  • Infrared remote control


  • Quick installation guide


  • Driver CD (Multi-lingual Software and User's Manual)
  • NEW Skystar 2

    by Unknown  |  at  8:28 PM


    NEW Skystar 2


    Ask a question about this product
    TechniSat DVB PCI Card The SkyStar 2 TV / PVR is optimally configured for the reception of data streams via satellite, utilizing the DVB broadcast standard. This allows for the use of, among others, high-speed Internet access. The software supplied also enables the reception of digital DVB TV and radio programmes directly into your PC.

    TechniSat offers immediately the digital PCI card SkyStar 2 TV / PVR with video recorder solution. Due to the PVR function (personal video recorder) the card enables the record of transmissions in addition to the reception of digital TV and radio programs via satellite. Stopping as well as the delayed recording (timer function) can be used, too. Beyond the possibility of timer programming from the EPG data is given.

    The TechniSat SkyStar 2 TV is equipped with a special viewer software.

    Specifications :
    Video text
    Plug & Play enabled
    Input frequency range 950 MHz - 2.150 MHz
    Symbol rate 2-45 MS/sec., SCPC and MCPC
    Operating system WIN 98, SE, ME, 2000, XP
    Made in Germany
    Tuner input: F-connector
    Input impedance: 75 Ohm
    Demodulation: QPSK
    Viterbi rates: 1/2, 2/3, 3/4, 5/6, 7/8, automatic adjustment
    LNC control: 14/18 Volt for polarisation switching
    22 kHz and DiSEqC 1.0 for switching frequency range
    IF-Bandwidth: 36 MHz
    Operating systems: Win 98 SE, Win 2000, Windows XP
    System requirements: PC with Pentium II 266 MHz and 32MB RAM (or higher)for data applications
    PC with Pentium II 350 MHz and 64MB RAM (or higher) for TV applications
    PCI or AGP graphics with min. 8 MB RAM and motion compensation, 3-D support
    free PCI slot Technical data SkyStar 2

    Recommended Hardware:
    TV reception:Intel PIII 700 MHz (or comparable models)
    128 MB RAM

    Data reception only:
    Intel PIII 500 MHz (or comparable models)
    64 MB RAM

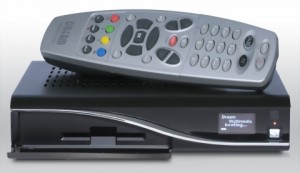
    DREAMBOX 800 HD PVR

    by Unknown  |  at  8:22 PM


    The Dreambox DM800 supports the Linux TV API have a look to HighDefinition TV on your Dreambox

    Features :

    - 300 MHz MIPS Processor
    - Linux Operating System
    - OLED - Display
    - MPEG-2 / H.264 Hardware decoding
    - Tuner: DVB-S, optional: DVB-C, DVB-T
    - Tuner Module, Plug&Play
    - 1 x Smartcard-Reader
    - V.24/RS232 Interface
    - 10/100Mbit Ethernet Interface
    - 1 x Scart (RGB, FBAS or S-Video)
    - DVI
    - 2 x USB 2.0
    - Analog modem
    - S/PDIF Interface for digital bit stream out (AC-3)
    - 64 MByte Flash, 256 MByte RAM
    - SATA
    for use either as internal SATA HDD 2,5
    or to use for extern eSATA
    - Unlimited channel lists for TV/Radio
    - Channel-change time less 1 second

    DBS-Tuner mit DVB-S2 :
    Frequency Range 950 … 2150 MHz
    Demodulation DVB-S (QPSK); DVB-S2 (8PSK,QPSK)
    Symbol rate DVB-S: 2 … 45 Mbaud/s, SCPC/ MCPC
    DVB-S2: 10 31 Mbaud/s (8PSK) , 10 30 Mbaud/s (QPSK)

    Video decoder : 
    Video Compression MPEG-2 and MPEG-1 compatible,
    H.246 Video Formats 4:3 / 16:9 Letterbox for 4:3 TV-Device

    Audio decoder :
    Audiokompression MPEG-1 & MPEG-2 Layer I and II, MP3
    Audio Mode Dual (main/sub),
    Stereo Frequency : 32 kHz, 44.1 kHz, 48 kHz, 16 kHz, 22.05 kHz, 24 kHz

    Output analog :
    Output Level L/R 0,5 Vss on 600 Ohm
    THD > 60 dB (1 kHz)
    Crosstalk < -65 dB Output digital : 
    Output Level 0,5 Vss on 75 Ohm
    Sampled Data Filtering 32 kHz, 44.1 kHz, 48 kHz S/PDIF
    -Output optical, Toslink

    Video parameter :
    Input Level FBAS 1 Vss +/- 0.3 dB on 75 Ohm
    Teletext filter in conformity with ETS 300 472 Standard

    TV-Scart :
    Output: FBAS, RGB, S-Video

    Serielle Interface RS 232 :
    Typ RS232 bidirectional Bitrate 115,2 kBit/s max.
    Plug Connector SUB-D-9 Function : Update of Firmware

    Ethernet :
    10/100 MBit
    compatible interface Function : Update of Firmware
    Analoge modem : Analoge modem for Internet connection

    SATA Interface :
    - For use either
    as internal HDD 2,5 or
    eSATA or internal 2,5? HDD

    USB :
    2 x USB 2.0 Host

    LNB power and polarisation per tuner : 
    LNB Current 500mA max.; short-circuit-protected
    LNB Voltage vertical 11,5V at 400mA
    LNB Voltage horizontal 17,3V at 400mA

    Count of active satellite position :
    DiSEqC 1.0/1.2 SAT POSITION / SAT OPTION DiSEqC - Rotor Control

    Power consumption : 
    15 Watt at 12 V


    Thursday, November 15, 2012

    How to guide: Setting up 4 or more LNBs on a Dreambox

    by Unknown  |  at  3:11 PM
    How to guide: Setting up 4 or more LNBs on a Dreambox
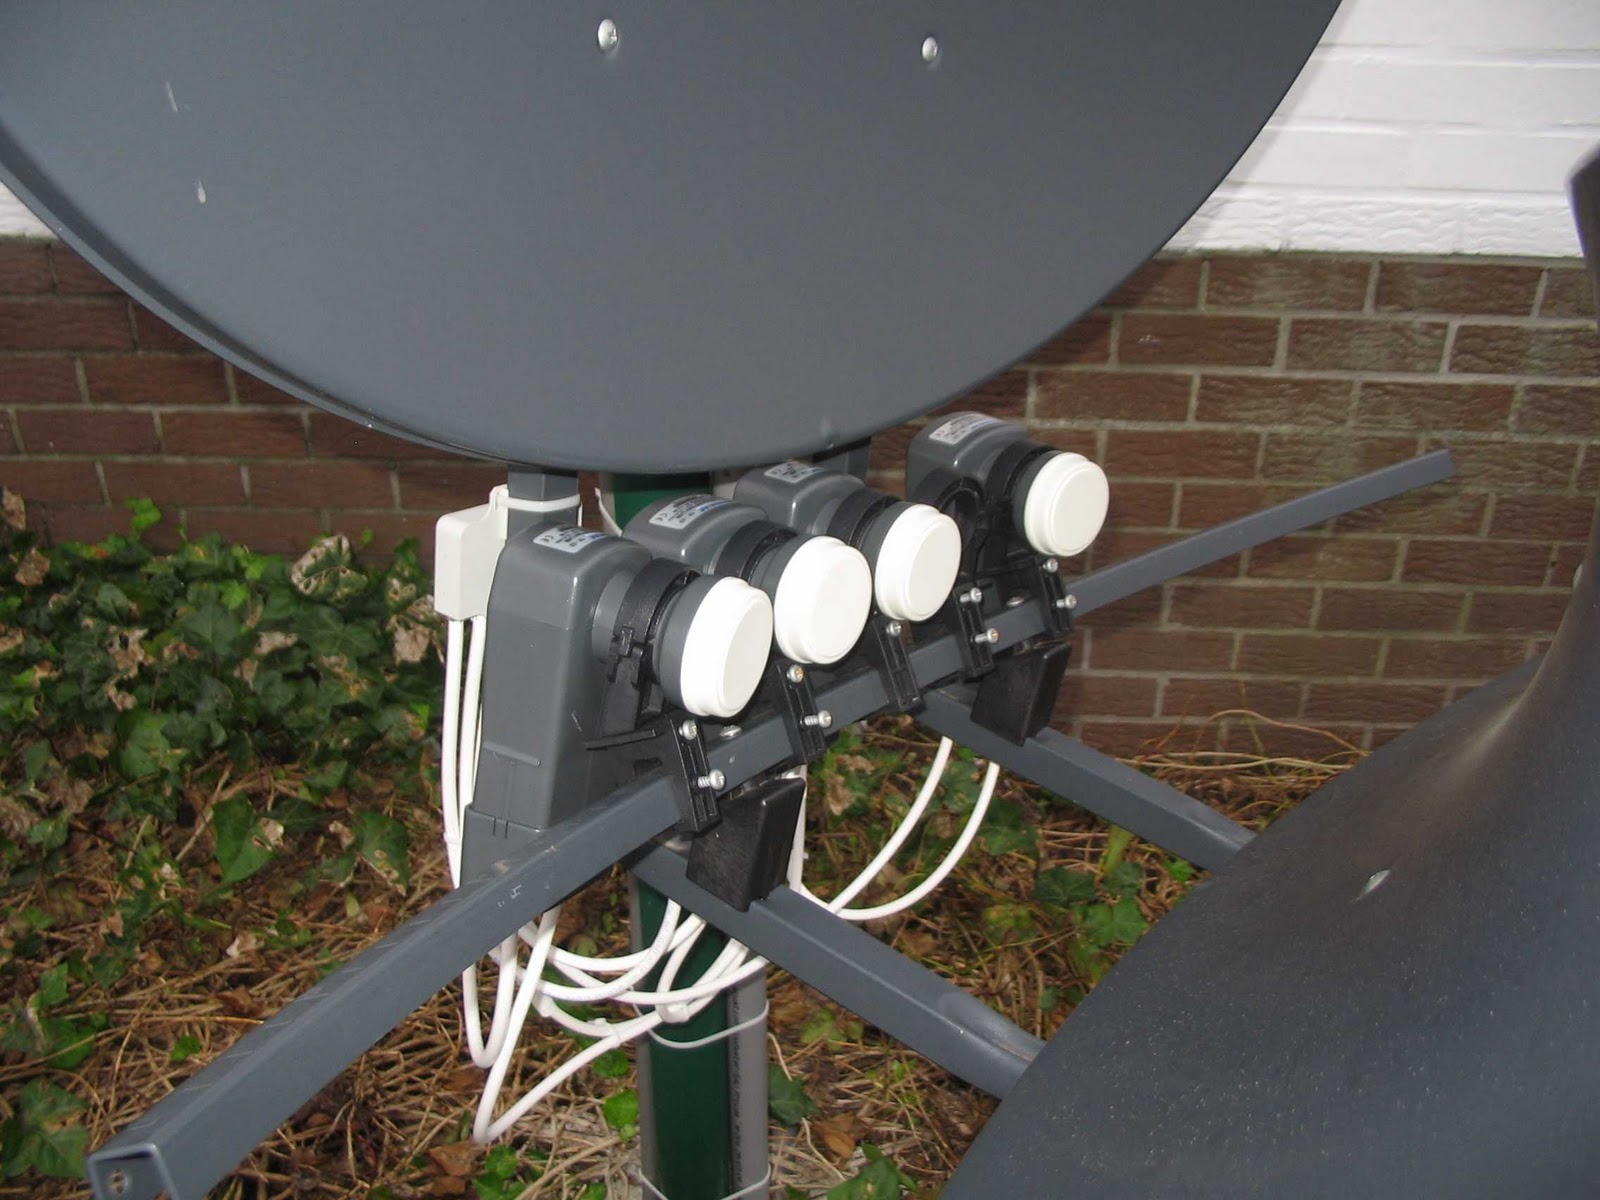
    A quick guide on  how to setup  4 of more LNBs on a Dreambox satellite receiver. For multi sat satellite (Astra, Hotbird, Thor, Sky etc.)
    multi lnb setup on spiderbox

    Thursday, October 25, 2012

    How to guide: Install & fit a hard disk drive into a Dreambox DM800HD

    by Unknown  |  in How to guide at  3:47 PM

    How to guide: Install & fit a hard disk drive into a Dreambox DM800HD

    A video guide on how to install and fit a hard drive into a Dream Box DM800HD satellite receiver, shows assembly and disassembly of the receiver. This is useful for use in pausing TV, recording TV, time shifting, pvr functions etc..
    Dream Multimedia Dreambox DM600 satellite receiver hard drive fitting video guide 

    The video guide tutorial :

    How to guide: Install & fit a hard disk drive into a Dreambox DM600

    by Unknown  |  in How to guide at  3:46 PM

    How to guide: Install & fit a hard disk drive into a Dreambox DM600

    A video guide on how to install and fit a hard drive into a Dream Box DM600, shows assembly and disassembly of the receiver.
    Dream Multimedia Dreambox DM600 satellite receiver hard drive fitting video guide 

    The video guide tutorial :
    The video is in German but you should be able to work out the basics from it.

    Identify : Differences between DM500S and it’ s clones

    by Unknown  |  in Identify at  3:46 PM
    Identify : Differences between DM500S and it’ s clones
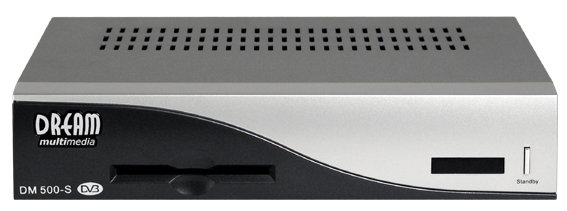
    Guide on helping identify clone from genuine Dreambox DM500S receivers. This is a very important step identifying your receiver correctly. Don’t want to put the wrong software/flash on it and end up with a door stop. The DM500S satellite receiver is VERY popular for cloners due to its super low price for such a feature packed machine, most DM500S receivers out there now are actual clones since they have not been made for a long time and are discontinued from Dream Multimedia.
    dreambox dm500s clones
    DM500-S front
    BILD:DM500S front 01 klein.jpg
    DM500-S back
    BILD:DM500S back 02 klein.jpg
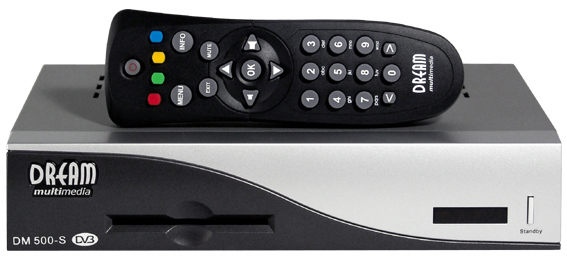
    DM 500-S front with Remote Control
    BILD:DM500S front rc 01 klein.jpg
    For the DM 500 Dream Multimedia have a Info page established. On this Page you can see the differences between DM 500 to Clone 500.
    If you not sure that your Dreambox is an original or you have a Clone Box contact
    Dream Multimedia Mail : plagiate@dream-multimedia-tv.de
    for help and Informations.
    Security Hologram
    Informationen about the Security Hologram klick here
    Warrenty Seal
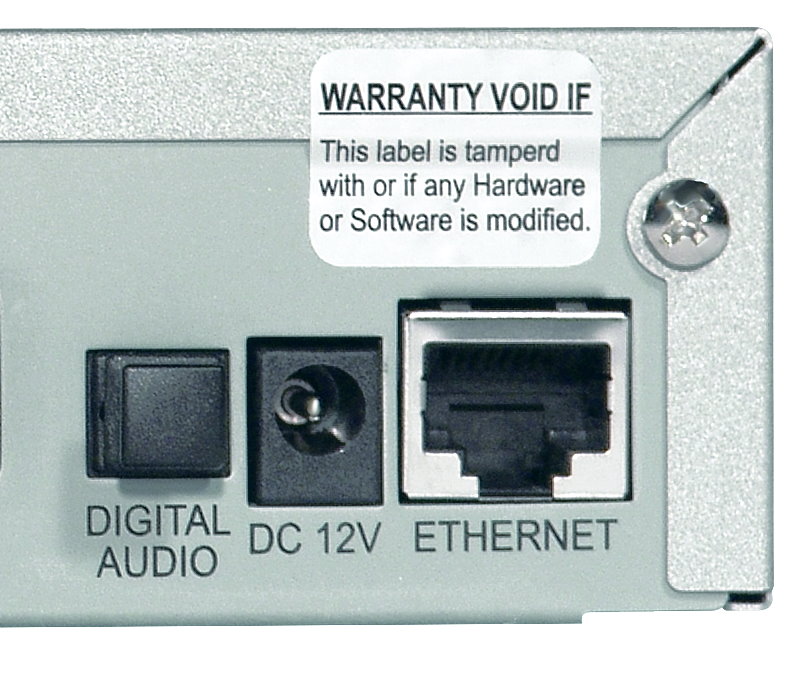
    This is a warranty seal of a DM 500.
    Bild:Garantie DM500.jpg
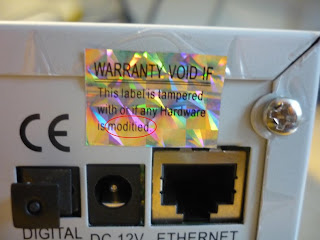
    At the Clone 500 is on the warranty seal a spelling error [moditied instead of modified]
    Bild:Garantie Clone500.jpg
    MAC Adresse
    The MAC Adresse of a DM500 begins with 00:09:34.
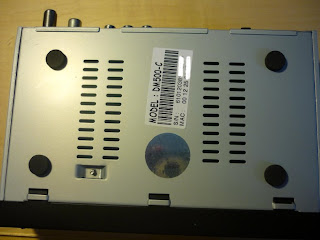
    The Mac Adress of a Clone 500 begins not with 00:09:34
    Bild:Clone 500 unten.jpg
    Back Side
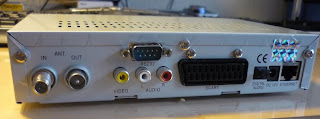
    The Backside of a Clone DM500S shows a bad fixed warranty seal and the housing is pastet with a foil.
    Bild:Clone 500 back.jpg

    How to guide: Identify the differences between a Dreambox DM800HD & a DM800 Clone

    by Unknown  |  in How to guide at  3:45 PM

    How to guide: Identify the differences between a Dreambox DM800HD & a DM800 Clone

    This guide may help you identify the key differences between a Dream Multimedia DM800HD genuine receiver and a cheap Chinese DM800HD clone. This information is useful in troubleshooting, upgrades, firmware flashing and other situations where getting the wrong info may do some damage.
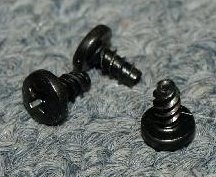
    Bild:Schrauben_DM.jpg

    The Housing screws of the DM 800 are for tin metal sheet with a rough thread.
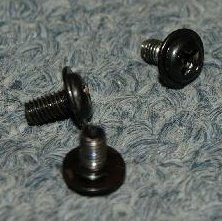
    Bild:Schrauben_DM.jpg
    The Housing screws of the Clone 800 are with a fine thread.
    Bild:Schrauben_Clone.jpg
    The screws at the back of the DM 800 differ from those of a clone 800. The screws for the eSATA connector are silver all other screws are black.
    The screws at the back of the Clone 800 are silver up to the two housing screws.

    SURFACE OF THE HOUSING

    The frame cover of DM 800 is painted with a structure.
    The frame cover the clone 800 is painted brilliant.

    HDMI KABEL

    The original HDMI cable of DM 800 is bound together with a rubber band.

    The HDMI cable Clone 800 is packed a bag.

    POWER SUPPLY UNIT

    The original Power Supply Unit of a DM 800 should look in such a way.
    This is a Power Supply Unit from Clone Boxes
    Modem
    The modem of a DM 800 is pasted with a not leading foil and on the back of the modem are components (IC, resistor …) to be seen.
    At the modem of a Clone 800 is missing the foil as well as the components.

    DREAMBOX SECURITY SIM CARD

    The SC in the DM 800 is clearly to recognize marked and with a resin or an glue fixed.

    Bild:SC Card DM.jpg
    Under the SC Card of a DM800 there are a lot of printed signs.

    The SC of the Clone is blanc and not fixed. On new Clone versions are SC Card´s with Hologram.
    Under the SC Card of a Clone there are a hand marked sign in this example an “A”.

    CPU COOLER

    The DM 800 have no CPU Cooler.

    The Cloneboxes have a CPU Cooler.

    This DM 800 Mainboard are labelet with 800 REV: and the 14 pin connector is right of the sata connector.

    On this Clone Box Mainboard is a label with DM800 REV: and the 14 pin connector is left of the sata connector.

    SECURITY HOLOGRAM

    From July 2008 until June 2009, a Security Hologram was attached on the packing as well as on the rear side of the unit. Newer boxes again ship without this hologram.
    Instead, in the future a plugin shall be available, calculating a verification number that can be entered and checked on Dream Multimedia’s website.

    How to guide: How to install New cccam on a Eagle box (DM500S clone)

    by Unknown  |  in How to install New cccam at  3:44 PM

    How to guide: How to install New cccam on a Eagle box (DM500S clone)

    Quick and easy guide on how to install CCCam on a Eagle Box or other Dreambox DM500S clone satellite receiver. 2 methods.

    From Cpanel
    – Press blue button twice
    – Start here for latest panel
    – Follow instructions to install
    – Exit, exit, exit
    – Blue button twice
    – Download emus and cccam 2.0.11 will be there
    – Choose version bin if you already have cccam previously installed, or full if you starting from scratch
    – Restart Eagle
    – Blue button
    – Choose cccam 2.0.11 from the top
    – Red to start and thatºs it
    Manual install
    – use tar.gz files assembled by eagle team
    – Careful to choose bin version if you have config file on var-etc so it does not overwrite your configurations
    – FTP tar.gz file to tmp folder on you eagle
    – Press blue twice on your remote
    – Addon manager
    – Manual install
    – Follow instructions
    – Exit, exit, exit
    – Restart Eagle
    – Blue button
    – Choose it from top
    – Red to restart
    – Enjoy
    Procedure to uninstall old version if needed
    Make sure to stop the cam which you are about to uninstall.
    1. Press the Blue Button and set the Default Softcam to Common Interface.
    2. Reboot your Eagle.
    3. Press Blue Button twice to go into The Eagle Control Panel.
    4. Scroll down to Addon Manager then press OK.
    5. Highlight the cam you wish to uninstall the press red to uninstall
    6. Reboot your Eagle.

    Adaptateur Wifi

    by Unknown  |  in Adaptateur Wifi at  3:43 PM


    Location: /Wifi Bridge


    Wifi Bridge
    Product Information 
    The Wifi Bridge is a portable device that allows you to instantly connect supported devices and peripherals (that are usually hard wired) wirelessly through the device’s existing Ethernet (RJ45) port. It supports WEP (64 bit), WEP (128 bit), WPA, WPA2 security. Applications include VoIP ATAs and VoIP Phones, gaming consoles (including the XBox 360), DVB Set Top Box’s (including Dreambox’s, Starview 6, Starview HD Combo, Protek 9600), Media Players and Streamers, NASDrives, Network Printers & Scanners, IP Security Cameras, IP DVR’s and many more.
    The Wifi Bridge is very small and compact (9cm x 5cm x 1.5cm), weighs 100 grams and can be hidden away behind your device.
    Can be powered from USB socket on satellite box or via 5v dc supply. For DM500s plug the power lead into the Wifi bridge and then
    the power lead output from wifi bridge into your DM500s so no extra plug/socket required.

    Product Description
    VAP11G

    Support SSID broadcast;
    Frequency: 2.4Ghz

    Specification:
    1 10/100 base Ethernet port;
    1 DC-2.0 female power port for power in;
    1 DC-2.0 male power port for power out;
    Input Voltage: DC5V-15V;
    Consumed Power: Less than 1.5W;
    Transmission Distance Indoor: 30m.

    Proudly Powered by Blogger.