.
.

Thursday, November 15, 2012

How to guide: Setting up 4 or more LNBs on a Dreambox

by Unknown  |  at  3:11 PM
How to guide: Setting up 4 or more LNBs on a Dreambox
A quick guide on  how to setup  4 of more LNBs on a Dreambox satellite receiver. For multi sat satellite (Astra, Hotbird, Thor, Sky etc.)
multi lnb setup on spiderbox

Thursday, October 25, 2012

How to guide: Install & fit a hard disk drive into a Dreambox DM800HD

by Unknown  |  in How to guide at  3:47 PM

How to guide: Install & fit a hard disk drive into a Dreambox DM800HD

A video guide on how to install and fit a hard drive into a Dream Box DM800HD satellite receiver, shows assembly and disassembly of the receiver. This is useful for use in pausing TV, recording TV, time shifting, pvr functions etc..
Dream Multimedia Dreambox DM600 satellite receiver hard drive fitting video guide 

The video guide tutorial :

How to guide: Install & fit a hard disk drive into a Dreambox DM600

by Unknown  |  in How to guide at  3:46 PM

How to guide: Install & fit a hard disk drive into a Dreambox DM600

A video guide on how to install and fit a hard drive into a Dream Box DM600, shows assembly and disassembly of the receiver.
Dream Multimedia Dreambox DM600 satellite receiver hard drive fitting video guide 

The video guide tutorial :
The video is in German but you should be able to work out the basics from it.

Identify : Differences between DM500S and it’ s clones

by Unknown  |  in Identify at  3:46 PM
Identify : Differences between DM500S and it’ s clones
Guide on helping identify clone from genuine Dreambox DM500S receivers. This is a very important step identifying your receiver correctly. Don’t want to put the wrong software/flash on it and end up with a door stop. The DM500S satellite receiver is VERY popular for cloners due to its super low price for such a feature packed machine, most DM500S receivers out there now are actual clones since they have not been made for a long time and are discontinued from Dream Multimedia.
dreambox dm500s clones
DM500-S front
BILD:DM500S front 01 klein.jpg
DM500-S back
BILD:DM500S back 02 klein.jpg
DM 500-S front with Remote Control
BILD:DM500S front rc 01 klein.jpg
For the DM 500 Dream Multimedia have a Info page established. On this Page you can see the differences between DM 500 to Clone 500.
If you not sure that your Dreambox is an original or you have a Clone Box contact
Dream Multimedia Mail : plagiate@dream-multimedia-tv.de
for help and Informations.
Security Hologram
Informationen about the Security Hologram klick here
Warrenty Seal
This is a warranty seal of a DM 500.
Bild:Garantie DM500.jpg
At the Clone 500 is on the warranty seal a spelling error [moditied instead of modified]
Bild:Garantie Clone500.jpg
MAC Adresse
The MAC Adresse of a DM500 begins with 00:09:34.
The Mac Adress of a Clone 500 begins not with 00:09:34
Bild:Clone 500 unten.jpg
Back Side
The Backside of a Clone DM500S shows a bad fixed warranty seal and the housing is pastet with a foil.
Bild:Clone 500 back.jpg

How to guide: Identify the differences between a Dreambox DM800HD & a DM800 Clone

by Unknown  |  in How to guide at  3:45 PM

How to guide: Identify the differences between a Dreambox DM800HD & a DM800 Clone

This guide may help you identify the key differences between a Dream Multimedia DM800HD genuine receiver and a cheap Chinese DM800HD clone. This information is useful in troubleshooting, upgrades, firmware flashing and other situations where getting the wrong info may do some damage.
Bild:Schrauben_DM.jpg

The Housing screws of the DM 800 are for tin metal sheet with a rough thread.
Bild:Schrauben_DM.jpg
The Housing screws of the Clone 800 are with a fine thread.
Bild:Schrauben_Clone.jpg
The screws at the back of the DM 800 differ from those of a clone 800. The screws for the eSATA connector are silver all other screws are black.
The screws at the back of the Clone 800 are silver up to the two housing screws.

SURFACE OF THE HOUSING

The frame cover of DM 800 is painted with a structure.
The frame cover the clone 800 is painted brilliant.

HDMI KABEL

The original HDMI cable of DM 800 is bound together with a rubber band.

The HDMI cable Clone 800 is packed a bag.

POWER SUPPLY UNIT

The original Power Supply Unit of a DM 800 should look in such a way.
This is a Power Supply Unit from Clone Boxes
Modem
The modem of a DM 800 is pasted with a not leading foil and on the back of the modem are components (IC, resistor …) to be seen.
At the modem of a Clone 800 is missing the foil as well as the components.

DREAMBOX SECURITY SIM CARD

The SC in the DM 800 is clearly to recognize marked and with a resin or an glue fixed.

Bild:SC Card DM.jpg
Under the SC Card of a DM800 there are a lot of printed signs.

The SC of the Clone is blanc and not fixed. On new Clone versions are SC Card´s with Hologram.
Under the SC Card of a Clone there are a hand marked sign in this example an “A”.

CPU COOLER

The DM 800 have no CPU Cooler.

The Cloneboxes have a CPU Cooler.

This DM 800 Mainboard are labelet with 800 REV: and the 14 pin connector is right of the sata connector.

On this Clone Box Mainboard is a label with DM800 REV: and the 14 pin connector is left of the sata connector.

SECURITY HOLOGRAM

From July 2008 until June 2009, a Security Hologram was attached on the packing as well as on the rear side of the unit. Newer boxes again ship without this hologram.
Instead, in the future a plugin shall be available, calculating a verification number that can be entered and checked on Dream Multimedia’s website.

How to guide: How to install New cccam on a Eagle box (DM500S clone)

by Unknown  |  in How to install New cccam at  3:44 PM

How to guide: How to install New cccam on a Eagle box (DM500S clone)

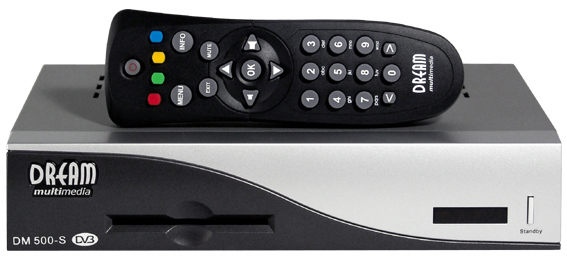
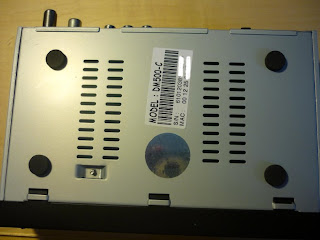
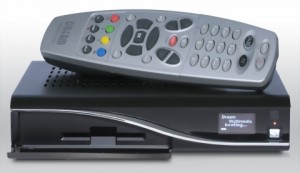
Quick and easy guide on how to install CCCam on a Eagle Box or other Dreambox DM500S clone satellite receiver. 2 methods.

From Cpanel
– Press blue button twice
– Start here for latest panel
– Follow instructions to install
– Exit, exit, exit
– Blue button twice
– Download emus and cccam 2.0.11 will be there
– Choose version bin if you already have cccam previously installed, or full if you starting from scratch
– Restart Eagle
– Blue button
– Choose cccam 2.0.11 from the top
– Red to start and thatºs it
Manual install
– use tar.gz files assembled by eagle team
– Careful to choose bin version if you have config file on var-etc so it does not overwrite your configurations
– FTP tar.gz file to tmp folder on you eagle
– Press blue twice on your remote
– Addon manager
– Manual install
– Follow instructions
– Exit, exit, exit
– Restart Eagle
– Blue button
– Choose it from top
– Red to restart
– Enjoy
Procedure to uninstall old version if needed
Make sure to stop the cam which you are about to uninstall.
1. Press the Blue Button and set the Default Softcam to Common Interface.
2. Reboot your Eagle.
3. Press Blue Button twice to go into The Eagle Control Panel.
4. Scroll down to Addon Manager then press OK.
5. Highlight the cam you wish to uninstall the press red to uninstall
6. Reboot your Eagle.

Adaptateur Wifi

by Unknown  |  in Adaptateur Wifi at  3:43 PM


Location: /Wifi Bridge


Wifi Bridge
Product Information 
The Wifi Bridge is a portable device that allows you to instantly connect supported devices and peripherals (that are usually hard wired) wirelessly through the device’s existing Ethernet (RJ45) port. It supports WEP (64 bit), WEP (128 bit), WPA, WPA2 security. Applications include VoIP ATAs and VoIP Phones, gaming consoles (including the XBox 360), DVB Set Top Box’s (including Dreambox’s, Starview 6, Starview HD Combo, Protek 9600), Media Players and Streamers, NASDrives, Network Printers & Scanners, IP Security Cameras, IP DVR’s and many more.
The Wifi Bridge is very small and compact (9cm x 5cm x 1.5cm), weighs 100 grams and can be hidden away behind your device.
Can be powered from USB socket on satellite box or via 5v dc supply. For DM500s plug the power lead into the Wifi bridge and then
the power lead output from wifi bridge into your DM500s so no extra plug/socket required.

Product Description
VAP11G

Support SSID broadcast;
Frequency: 2.4Ghz

Specification:
1 10/100 base Ethernet port;
1 DC-2.0 female power port for power in;
1 DC-2.0 male power port for power out;
Input Voltage: DC5V-15V;
Consumed Power: Less than 1.5W;
Transmission Distance Indoor: 30m.

Proudly Powered by Blogger.